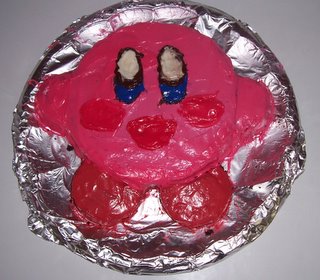
 Kirby from Nintendo is Pink and cute. He is Gavin's favorite character. Since it is Gavin's birthday he can request any cake he likes. He wanted a Kirby cake.
 Step One:
Make 2 cakes. I used a round spring Form Pan and a 9x13 pan. Cook them and let them cool.

Step Two:
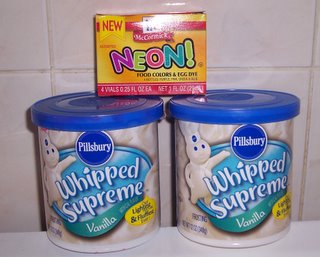
Mix your frosting. I made pink, blue, dark pink and red. You will need black and white for the eyes. Make sure to mix enough of the red and pink because if you run out it is hard to match colors.
I used 3 tubs of white frosting and some left over chocolate frosting. We had a hard time finding food coloring so ended up with Neon colors. If I was in the US or near a bigger commissary I probably could have gotten the tubes of icing for some of the colors making this a little easier.
Take the cakes out of their pans. I used a smallish bowl to "trace for the legs and just chopped until I was happy with the arms. Arrange your Kirby.

Step Four:
Take a break and play with your new puppy. :)

Step Five:
Begin to frost. I started with the arms and body. Stick a little frosting between the cake and the legs/arms so it can act like glue. I ended up using some toothpicks to hold the legs on.
 Step Six:
Add the eyes, cheeks and mouth. If I had it to do again I think I would have just made a smile for the mouth. But this is how Gavin wanted it. And he loved the cake. 
And it is all done...add some kids and candles and you have a Kirby Birthday Cake!


5 comments:
Take a break to play with the new puppy... :lmao: Love the cake you did a great job!!!
thanks for the recipe. now doing andre cake here in DC !!
My 4 year old wanted a kirby cake for his birthday, I was so HAPPY to find your site. Well laid out and easy to follow! PS also love your puppy too cute!
My 7yr old wants a Kirby cake for her b-day tomorrow (1/17)! Thank you for posting your instructions, whcih look really easy to follow!! I intend to follow them later today.
sweet cake!loved it.
i used it for my how to project.
i made it into a pamphlet!
: )
Post a Comment